How to Install DIY Rope Hooks
To install DIY rope hooks, start by selecting the right rope and hooks that suit your space. Measure and mark the wall for accurate placements. After evaluating and cleaning the area, drill holes and secure hooks with screws. Verify they’re evenly spaced and at a comfortable height. For maintenance, wipe them down and apply rust-resistant spray as needed. If you want to explore creative uses and enhance your space further, there’s plenty more to discover.
Materials Needed for DIY Rope Hooks
When you’re ready to tackle your DIY rope hooks project, having the right materials on hand is crucial for a smooth installation. Start by selecting the appropriate rope types, as different ropes can serve various purposes. For instance, cotton ropes are great for indoor use, while nylon is perfect for outdoor applications due to its durability. Next, choose your hook styles; you might prefer S-hooks for easy attachment or wall-mounted hooks for a more permanent solution. Don’t forget to gather screws, anchors, and a drill for a secure installation. Having these materials ready guarantees you can efficiently create the perfect setup for your ropes, allowing you the freedom to organize and beautify your space as you envision.
Measuring and Planning Your Layout
Before you start installing your rope hooks, it’s important to measure and plan your layout carefully to guarantee everything fits perfectly. Begin by evaluating your available wall space, considering both design aesthetic and functionality. Think about how the hooks will complement your decor while also optimizing space. Use a level and measuring tape to mark where each hook will go, ensuring they’re evenly spaced for a cohesive look. Don’t forget to factor in the height—your rope should hang at a comfortable level for use. This thoughtful approach not only enhances your room’s appearance but also maximizes its utility. Take your time with this step; a well-planned layout will make the installation process smoother and more rewarding.
Choosing the Right Rope
When choosing the right rope for your hooks, consider both the material and thickness. Different materials offer varying durability, so think about how much wear and tear your rope will face. Additionally, the rope’s thickness is essential for weight support and safety, so make sure it’s appropriate for your intended use.
Material Durability Considerations
Choosing the right rope is essential for ensuring durability and safety in your projects. You’ll want to evaluate the material lifespan of the rope you select, as this directly affects how long it’ll serve you. Natural fibers like cotton are eco-friendly but may degrade faster than synthetic options like nylon or polyester, which offer greater strength and resistance to wear. However, synthetic ropes can have a higher environmental impact due to their manufacturing process. Always weigh your options: opt for durable materials that align with your values and the intended use of your rope hooks. This way, you can enjoy the freedom of creativity without compromising on sustainability and safety. Make a choice that reflects your commitment to both functionality and the environment.
Rope Thickness Importance
While evaluating your options for rope, the thickness you select plays an essential role in both performance and safety. Choosing the right thickness impacts your project considerably, affecting rope strength and flexibility. Here are three key factors to evaluate:
- Load Capacity: Thicker ropes generally offer greater strength, allowing you to carry heavier loads without risk.
- Flexibility: Thinner ropes can provide better flexibility, making them easier to maneuver in tight spaces.
- Application Suitability: Depending on your project, certain thicknesses may be better suited for specific tasks, like securing or lifting.
Preparing the Wall for Installation
Before you start installing rope hooks, it’s essential to prepare the wall properly to guarantee a secure fit. Begin with a wall condition assessment; check for cracks, dampness, or any other damage that could affect stability. Clean the area where you’ll install the hooks, making sure it’s free from dust and grease. If you’re working with drywall or plaster, consider reinforcing the area with a wall anchor for added support. Next, decide on the exact location for your hooks, marking the spots with a pencil. This wall surface preparation will not only ensure your hooks hold securely but also help maintain the aesthetic of your space. Taking these steps will lead to a successful installation and give you peace of mind.
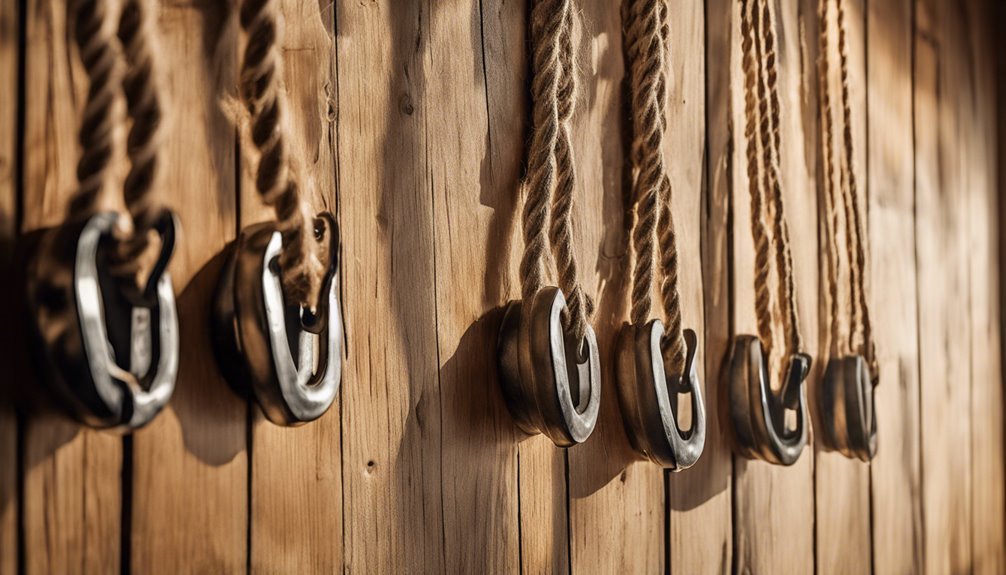
Creating the Rope Hooks
Once the wall is prepped and ready, you can start creating the rope hooks. First, decide on your hook styles based on your desired aesthetic. Consider these three options:
- Classic Metal Hooks: Durable and timeless, perfect for any setting.
- Wooden Hooks: Offers a rustic charm and can be stained or painted to match your decor.
- Rope-Only Design: For a unique and minimalist approach, simply tie knots in strong rope and secure them as hooks.
Next, gather your materials and tools, ensuring you have everything ready for a smooth process. Explore various rope design ideas to suit your space’s vibe. Remember, these hooks should not only be functional but also enhance your room’s style and atmosphere.
Attaching the Hooks to the Wall
To attach the hooks to the wall, you’ll need a few essential tools like a drill, level, and measuring tape. Start by measuring the ideal placement for your hooks to guarantee they’re evenly spaced and at the right height. Once you’ve marked the spots, you can proceed with the installation.
Tools Required for Installation
While you may be enthusiastic to hang your rope hooks, having the right tools on hand is vital for a successful installation. Choosing the correct tool types can make all the difference in your project’s outcome. Here’s what you’ll need:
- Drill: For making precise holes in the wall.
- Screwdriver: To securely fasten the hooks in place.
- Level: Guarantees your hooks are perfectly aligned.
With these tools, you’ll be equipped to execute effective installation techniques that assure stability and functionality. Don’t forget to gather screws and anchors suited for your wall type, as they’re essential for properly securing your hooks. Get ready to embrace the freedom of organized space!
Measuring Hook Placement
Before you start drilling, it’s essential to measure the hook placement accurately to guarantee they’re both functional and aesthetically pleasing. First, determine the ideal hook height based on what you’ll be hanging. Generally, a height of about 60 inches from the floor works well for most items. Next, follow spacing guidelines to make sure your hooks aren’t too close together, which can lead to a cluttered look. Aim for at least 12 to 18 inches between hooks, depending on their size and the items you plan to hang. Mark these measurements lightly on the wall with a pencil, so you have a clear guide before making any holes. This careful preparation will help you achieve a neat and organized hanging system.
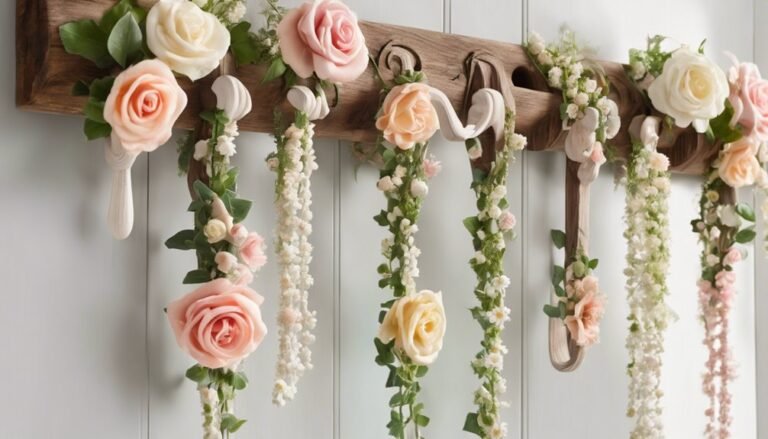
Decorating With Your Rope Hooks
As you explore ways to enhance your space, incorporating rope hooks can add both functionality and aesthetic appeal. You can play around with various rope color combinations and creative rope designs to truly personalize your decor. Here are some ideas for decorating with your rope hooks:
- Entryway Organization: Use them for hanging jackets, bags, or hats, adding a touch of style to your entryway.
- Artistic Displays: Hang lightweight art or framed photos, showcasing your unique taste.
- Functional Decor: Use rope hooks in the kitchen for towels or utensils, blending practicality with a chic look.
Tips for Maintaining Your Rope Hooks
To keep your rope hooks looking their best and functioning properly, regular maintenance is essential. Start with some simple rope maintenance tips. Wipe down the hooks with a damp cloth to remove dust and dirt. For tougher grime, use a mild soap solution and a soft brush, then rinse and dry thoroughly. Check the rope regularly for fraying or wear, and replace it if necessary to guarantee safety and durability. If you notice rust on metal hooks, use a wire brush and apply a rust-resistant spray to protect them. Finally, always secure the hooks properly to prevent them from loosening over time. By following these cleaning techniques, you’ll extend the life of your rope hooks and keep them looking great.
Alternative Uses for Rope Hooks
Rope hooks aren’t just for hanging ropes; they can serve a variety of practical purposes around your home or workspace. You can get creative with their decorative uses and enhance your environment while keeping things organized. Here are three alternative applications for rope hooks:
- Coat and Hat Racks: Use them in your entryway to hang coats, hats, or bags, adding a practical touch to your space.
- Garden Tool Storage: Install them in your shed or garage for easy access to tools and equipment.
- Art Display: Hang lightweight artwork or photos for a unique gallery wall, showcasing your personality.
Enhancing Your Space With Additional DIY Projects
Now that you’ve installed your rope hooks, consider taking your space to the next level with some creative DIY projects. Think about incorporating wall art ideas, functional storage solutions, or outdoor decor inspiration to enhance your environment. These additions can elevate both style and practicality in your home.
Wall Art Ideas
While many think of wall art as merely decorative, it can also serve as a functional element in your space. By embracing current wall art trends, you can create creative displays that enhance both aesthetics and utility. Here are three practical ideas:
- Framed Storage: Use decorative frames to hold small items like keys or notes, merging art and functionality.
- Artistic Shelving: Install shelves that double as artwork. Paint them in bold colors or unique shapes to make a statement.
- Hanging Planters: Incorporate plants into your wall decor. Hanging planters not only beautify your environment but also purify the air.
These ideas allow you to express your personal style while adding practicality to your walls. Enjoy the freedom of creativity!
Functional Storage Solutions
If you’re looking to maximize your space without sacrificing style, functional storage solutions can be a game changer. By incorporating DIY projects like rope hooks, you can achieve both functional organization and creative storage. These hooks can hold everything from bags to towels, freeing up floor space and keeping your area tidy. Consider building shelves or using baskets to complement your hooks; they add flair while providing extra storage. Labeling bins or using clear containers helps maintain organization, making it easy to find what you need. Embrace your creativity and personalize your space with these projects. You’ll not only enjoy a clutter-free environment but also the satisfaction of having designed solutions that reflect your unique style.
Outdoor Decor Inspiration
Transforming your outdoor space can be a rewarding endeavor, especially when you incorporate DIY projects that reflect your personal style. To enhance your outdoor aesthetics and align with your garden themes, consider these ideas:
- Customized Planters: Create unique planters using reclaimed wood or vibrant paint to showcase your favorite flowers.
- Outdoor Lighting: Install string lights or lanterns to add warmth and ambiance, making your space inviting for evening gatherings.
- Seating Areas: Build simple benches or hammocks that invite relaxation and can serve as focal points in your garden.
References
- https://www.wikihow.com/Make-Rope-Hooks
- https://www.extension.purdue.edu/extmedia/ID/ID-179.pdf
- https://www.instructables.com/Rope-Hooks/
- https://www.treeservice.com/how-to-install-rope-hooks/
- https://www.thefamilyhandyman.com/project/how-to-install-a-hanging-rope-hook/
- https://www.clemson.edu/extension/woodworking/woodworking_resources.html